Monday, February 23, 2009

Stuffed Mushrooms

For years I've made stuffed mushrooms and they were good. Then I got the challenge of making gluten-free foods, so I needed to get a little more creative. So I did. And they were amazing!

In most stuffed mushroom recipes, bread crumbs bind the stuffing together. But when you work gluten-free, bread is right out. So I thought to myself, "What else binds foods together?"

Cheese and egg do quite often. Unfortunately, egg is out because my friend is an lacto-vegetarian and doesn't do eggs. But, done carefully, cheese can bind the stuffing together on its own. Specifically, a mixture of ricotta and mozzarella can.

Unfortunately, they were so good we ate them before I could get any pictures.

Stuffed Mushrooms
9 med. to large crimini mushrooms
4 stalks of asparagus
2 green onions
2 teaspoons minced garlic
1 teaspoon olive oil
1 cup mozzarella cheese
1 cup ricotta cheese
Pepper to taste
Salt to taste

Clean and cut the asparagus and onions into coins. Remove the stalks from the mushrooms; these can be added to the stuffing if desired. Saute asparagus, onions, garlic, and optional mushroom stalks in the olive oil for 5 to 10 minutes. Add salt and pepper. Set aside to cool.

Preheat oven to 350°F (175°C).

Place mushrooms stalk side up in a baking pan. Combine the asparagus mixture with the ricotta and 1/3 of the mozzarella. Place in mushrooms. Cover the stuffed mushrooms with the remaining mozzarella. Bake for 20 minutes or until mozzarella begins to brown.

Serve piping hot.
I prefer using crimini mushrooms to using large white buttons. Criminis are sometimes called baby portabellos -- with all that implies. I like the firmer, meatier texture; it gives the stuffed mushrooms more body. Criminis also can handle denser, heavier stuffings. I also prefer the flavor of criminis, richer and more savory than a white mushroom could ever dream of.

The stuffed mushrooms were very cheesy, but quite yummy. The mushrooms were firm and moist, but not soggy. The cheese was, again, nice and firm. I had made ricotta cheese and the flavor just was incredible. I usually use these as an appetizer, popping them in the oven just as the guests arrive.

Monday, February 16, 2009

Homemade Ricotta

Daniel Meyer talks about his experience making ricotta in Discovering Ricotta in Mark Bittman's NY Times blog on January 26, 2009. So I decided to try it.

Daniel Meyer's Ricotta Cheese
1/2 gallon of milk
1 teaspoon of salt
3 tablespoons of lemon juice or 1/2 pint of buttermilk (I used the buttermilk)

Per his instructions, I heated the milk and salt over med-high heat until it was about 170°F (75°C), stirring regularly. I then added the buttermilk and reduced the heat to med-low.

I waited three minutes then looked at the curd. It didn't seem to be too thick, so I let it sit a bit longer. After about 20 minutes, I decided it has curdled enough so I started removing the curd into a cheesecloth-lined colander over a bowl. I finally decided that it was going to be too much work to remove all the curd with the slotted spoon (a lot was slipping through the slots - my spoon had big slots), so I poured the mixture through the colander. Once I was done, I returned the colander and the curd to the pan, twisted the cheesecloth closed, and used the back of a wooden spoon to squeeze the whey out of the curd (quite literally). I left it in the fridge for about an hour to finish draining.
The curd was nice and firm and quite yummy. It has a little sharpness and a little saltiness, but wasn't nearly as salty as the store-bought stuff. The curd was firmer and less watery than what you can buy in the store. I plan to use the ricotta in stuffed mushrooms later.

Some people responded to the NY Times blog stating that this was paneer instead of ricotta. It was certainly firmer and had less whey than the ricotta you buy in the store. Either way, it was yummy.

Monday, February 9, 2009

Roasted Chicken and Roasted Vegetable Soup

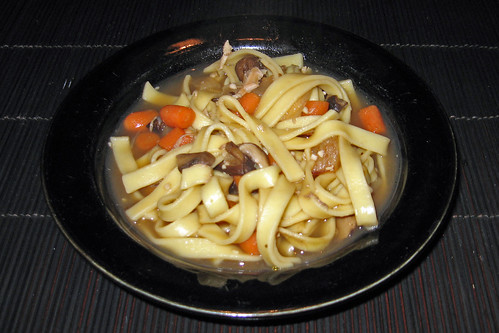
Well, after I roasted the chicken (see previous post), I had a wonderful idea: roasted chicken and vegetable soup. I didn't want to waste any of the deliciousness that was the chicken.

I took the carcass from the chicken I roasted, pulled off any remaining large chunks meat, then boiled the carcass. I also scraped all the jelly off the serving platter (that's where a lot of the gelatin pools) and added it to the broth . I then roasted up some veggies for the soup.


Roasted Chicken and Vegetable Soup

1 5 lb chicken carcass
4 cups of noodles (thick, dumpling-like noodles work best)
3/4 inch piece of fresh ginger
1/2 pound of carrots
1 large turnip
1 medium onion
3/4 pound of mushrooms (preferably crimini)
1/2 cup of extra-virgin olive oil
3 bay leaves
3 tablespoons of chopped garlic
1 tablespoon of sesame seeds
1/2 tablespoon of ground cumin
freshly ground black pepper to taste
1 tablespoon of balsamic vinegar
Water

Preheat oven to 450°F (232°C).

While roasting the chicken, put the giblets and neck in a pan to boil. This can be done ahead of time. Once the chicken is roasted, remove the large cuts of meat from the carcass. Reserve some of the roasted meat for soup; use or freeze the remainder.

Put the carcass and skin in the pan with the giblets and neck and simmer. As the carcass simmers, regularly scum away the froth and fat that collects on the top of the broth.

Chop carrots, turnip, onion, and mushrooms into bite-size pieces. Drizzle olive oil and 1/2 teaspoon of salt over the vegetables and mix until all of the vegetables are coated. Coat a baking sheet with sides with olive oil (a sheet of aluminum foil can be placed in the bottom of the sheet and oiled for easier cleaning). Put vegetables in the sheet. Roast until nearly done, about 1/2 hour or so.

Once the stock has simmered for a few hours, strain the chicken carcass out of the stock. Remove useful meat from the carcass and return to the broth. Add the vegetables and vinegar.

Simmer for an hour. Continue scumming any froth or floating fat. Add noodles and cook until noodles are done. Enjoy!
This soup can be made with roasted potatoes in addition to or instead of the noodles. I don't like my soups too starchy, so I only use one starch. When I make chicken soup, I prefer noodles. When we moved to Spokane, I discovered Country Pasta, a brand of noodles that are much, much thicker than standard egg noodles, at Costco. I love the texture they bring, dense and chewy, almost dumpling-like.

The soup turned out really, really well. The balsamic vinegar really highlighted the roasted flavors of the chicken and vegetables without making the soup sour or tangy. I roasted the vegetables until they were done and they were good, but I think taking them out of the oven while they are still al dente will make the soup a little more flavorful without making the veggies mushy.

Monday, February 2, 2009

One-oven Meals

As I stated a few weeks ago, I love to roast! I will roast beef, chicken, lamb, pork, potatoes, vegetables, apples -- just about anything. The weather recently turned colder (our lows are about to go below zero again!), so I wanted to heat up the downstairs without using too much electricity. Using the oven allowed me to make dinner and heat up the house.

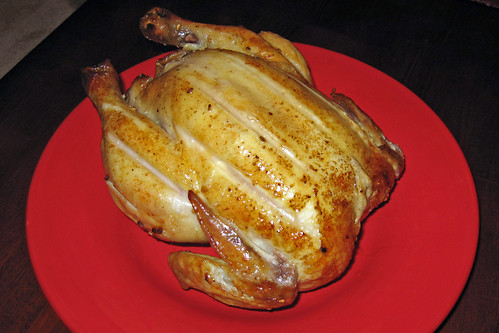
Dinner was roasted chicken stuffed with aromatics and roasted veggies. The house smells amazing.

Roasted Chicken
5 lb chicken, whole
1/2 medium onion
3-4 tablespoons chopped garlic
1-inch piece of fresh ginger
1 teaspoon cumin seeds, whole
2 teaspoons sesame seeds, whole
1/2 teaspoon black peppercorns, whole
1-2 teaspoons kosher salt
2-3 teaspoons olive oil

Preheat oven to 450°F (232°C).

Chop the onion into large pieces, approximately 1-inch pieces. Slice the ginger into thick slices. Toast the cumin and sesame seeds in a small skillet on low heat until the seeds turn brown. Mix the aromatics together.

Clean the neck and giblets, large gobs of fat, and extra viscera out of the cavity of the chicken. Oil the chicken skin with a little olive oil. Stuff the chicken with the aromatics. Place chicken breast down on a roasting rack in a roasting pan (or cookie sheet with sides). Roast until the chicken reaches 180°F (82°C) -- about 15 minutes to the pound. Test the doneness of the chicken by temp, not time or "jiggle test." Rest the chicken at least 15 minutes.

If the chicken breast does not get brown enough, turn the chicken over once it reaches 150
°F (65°C) and finish roasting. I often don't turn the chicken if there is a lot of air circulation around the bird.
2009 01 24 roast chicken

Roasted Vegetables
1/4 to 1/2 pound carrots (baby carrots preferred)
4 large crimini mushrooms
1 med to large turnip
1 med to large beet
8 brussel sprouts
1/2 med onion
1/4 head of cauliflower
2 med to large potatoes (I prefer white potatoes, though russets and yukon golds will work as well)
1/4 to 1/2 cup olive oil
1 teaspoon kosher salt

Wash the vegetables well. Peel the onion, beet, and turnip; I like the potatoes with the skin. Chop all the vegetables into bite-size pieces.

Oil a cookie sheet with sides. Drizzle the vegetables with oil and sprinkle the salt on them. Toss the veggies in the oil until all the vegetables are coated (if you cut smaller pieces than I did, you might need more oil). Spread out on cookie sheet into single layer. The beets will bleed onto other vegetables. If this is an issue, roast the beets on a separate cookie sheet.

Roast at 450°F (232°C) for 30-45 minutes until the vegetables are tender. Add pepper, garlic, or other herbs to taste.
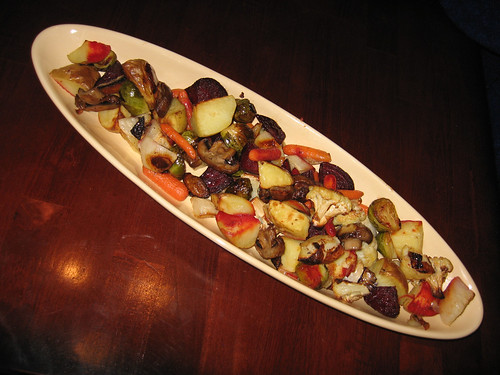
2009 01 24 roast veggies


Yes, the house got wonderfully warm and yummy-smelling. I enjoyed the cooking/smelling process as much as the eating process.

To cook everything in a single oven, you need to put the bottom rack nearly to the lowest setting and the top rack almost to the top. The more space between the racks, the more air circulation you have. In addition, try to make sure the top disk is smaller than the bottom dish. Again, this will help with air circulation so your chicken will roast and not steam.

The chicken was amazingly tender and juicy. By roasting it breast down, the chicken was self-basting and the breast never got a chance to dry out. In addition, the dark meat was juicy, but not greasy. Unfortunately, the breast didn't brown the way I wanted -- I should have oiled the breast and turned the chicken over. That would also have prevented the chicken from sticking to the roasting rack (not too much of a problem).

The veggies, on the other hand, were pretty spot-on. Wonderful Maillard reactions and caramelized vegetable sugars. The cauliflower and the brussel sprouts did incredibly well -- they got sweeter and less cabbage-y.
The potatoes and turnips were sweet and creamy.

And, in the interest of getting the most out of everything, I get to make chicken stock from the carcass!

Saturday, January 31, 2009

Book Review: What Einstein Told His Cook, Vols 1 and 2

What Einstein Told His Cook, volume 1 and volume 2, by Robert Wolf, discuss the physics and chemistry of cooking. It's question and answer format creates a friendly, informal tone that is accessible to all cooks, new and experienced. McGee's On Food and Cooking is a much more complete discussion of the science behind cooking, but is not nearly as easily understandable for the average reader.

Neither volume of What Einstein Told His Cook is really intended to be read through from cover to cover. Rather Wolf really sees his book more as a reference book for cooks. Of course, I read both through cover-to-cover (and back-to-back); this way, I could find out what he discussed in each book and know where to go later if need be.

For the most part, the science is clearly and well-explained. Wolf's scientific training and experience as a teacher-- ahem -- college professor shine through. His explanations do not assume that you understand more science than what most junior high school students have had. I like this approach; it reduces the chance you will misunderstand his explanations.

One of my favorite discussions in both volumes was his discussion of fats. I came into the discussion understanding what a saturate fat was and what an unsaturated fat was. I also understood that hydrogenation adds hydrogen molecules to an unsaturated fat. Thanks to Wolf, I now understand what a trans fat is and why that is bad -- something McGee was unable to do.

Each section contains some recipes that underscore the points he made in that section. The recipes are easy to find and relatively easy to follow. I haven't tried any of them yet, so I can't speak to how tasty they are.

Like any book, it has its weaknesses. Volume 2 is definitely the weaker of the two volumes. His answers aren't quite as clearly written and I have had some serious questions about a few of the scientific claims. Still, there is good information in it, so it is worth reading at least once.

Monday, January 26, 2009

Soup, wonderful soup

This last week I came down with a bit of a cold. Mostly it was sore throat and earaches (at least at first). So I did what I normally do when I feel crappy -- I made soup. Not chicken soup, but rather ham and bean soup.

When Julia and I returned home from the holidays, we returned with more than just our holiday gifts. We returned with half of a bone-in country ham. For those who don't know what is so special about country ham, it is salt-cured. Really, really salt-cured.. As in the hams do not have to be refrigerated to be stored and are hard as rocks.


Preparing a country ham is a whole ritual in and of itself. The exterior of the ham must be scrubbed to remove any mold that might have grown. (Note: The mold that grows actually prevents pathogenic bacteria and molds from growing.) Then the ham must be soaked for 12-18 hours to remove the excess salt. Then the ham is baked until done. When we carve the ham, we always save some meat around the bone for soup-making.

Soup is a wonderfully flexible dish; the proportions between meat, vegetables, spicing, etc. can adjusted to available ingredients and individual tastes. The soup bone I used this time had lots more meat than usual.

Ham and Bean Soup
1/2 to 1 pound of country ham with bone in
15 oz. bag of 15-bean soup mix (with flavor packet removed, I just like the mix of beans)
1 medium to large onion, chopped into bite-size pieces
1/2 pound of carrots, chopped into bite-size pieces
1-2 celery stalks, chopped into bite-size pieces
1/2 pound of mushrooms cut into bite-size pieces
2 tablespoons chopped garlic (I just garlic from a jar)
3 bay leaves
1/2 teaspoon chopped thyme
1/4 teaspoon celery seed
1 teaspoon freshly ground pepper
1/8 cup white vinegar
Enough water to cover all the ingredients

Soak the beans overnight. Drain. If the beans can not be soaked overnight, then they can be soaked in an oven preheated to 250°F (121°C) for 2-3 hours. In a real pinch, they can be simmered for an hour, then brought up to a boil to cook. Doing so leads to a thinner broth, but firmer beans.

Combine all ingredients and simmer for at least 3 hours, preferably 4-6. Add water as necessary to keep food covered and stir occasionally.

At least an hour before serving, remove the bone(s). I like to get the marrow out of the bones; normally this is done before the bones are boiled, but since they were already cooked through, I wait until near the end. Put some broth in a tall bowl or cup, add the marrow, then use my hand blender to puree the marrow into the broth. Return mixture to the soup. The marrow adds more wonderful richness.

Note that no salt is added to this recipe; the country ham will supply all the salt needed.


For dinner the next evening, we decided to let the soup simmer a bit longer. I had simmered it for three hours after I put the beans in (started everything else while I soaked the beans), but it wasn't quite the consistency I wanted. The beans were firmed that I wanted and the broth wasn't quite thick enough. Another hour of simmering and voila!, the soup was much, much better. Then again, I often think bean soup is better on days two and three. The flavors marry so much overnight and develop a lot of depth.

This recipe can by varied by which vegetables are added (I often only use mushrooms and onions, roasting the vegetables before adding them to the soup, using lemon juice or balsamic vinegar instead of white, or using a sugar-cured ham (though you need to add salt).

Monday, January 19, 2009

Roasting

Roasts are a simple way to do meat and heat up your kitchen at the same time. I love roasting meats in the winter! But too many times, roasts are dull. Sure they have the great Maillard browning on the surface, but there is too little complexity to the flavor. But how can you get great flavor with little work?

The solution is marinade. Marinades can be made from nearly any potable fluid in the kitchen: vinegar, milk, wine, soda, etc. Some work better than others; not all work well for a roast. I like to marinade my chicken in milk (or buttermilk) when making fried chicken, but don't think it will work too well on a roast. On the other hand, wine works amazingly for nearly all applications (I plan to try it with fried chicken soon).

Yesterday I had friends over for singing and gossiping. All of them had religious issues with alcohol, so I needed a non-wine marinade.


Roast Marinaded in Mustard Horseradish
Most of these measurements are approximates - I added ingredients until the marinade smelled/looked right
A three-pound roast -- I used a round sirloin roast
3/4 cup of worchestershire sauce
1/4 cup of soy sauce
1/2 cup of white wine vinegar
4 tablespoons of minced garlic -- I used preminced garlic in a jar
2 -3 tablespoons of honey
2 teaspoons of dijon mustard
2 teaspoons of horseradish (not cream of horseradish)
1/2 teaspoon of dried ginger

Gently score the top and bottom of the roast. The scores only need to be 1/8" deep.

Blend all ingredients (except meat) with hand blender until the marinade is a consistent texture. Pour about half the marinade in a bowl that is a little wider and deeper than the roast.
Pour the remaining marinade over the meat. If the meat is not fully covered by the marinade, you will need to turn the roast over every 15 minutes to ensure even coating. Marinade between 1/2 hour to 1 hour. Put meat on roasting rack in the roaster.

Move the lowest rack to its lowest setting. Preheat the oven to 450°F (232°C). Roast meat until it reaches the desired level of done. I roasted until the meat reached 145°F (62°C); I used an oven thermometer with temperature alarm, so I didn't time it. Let meat rest before carving.

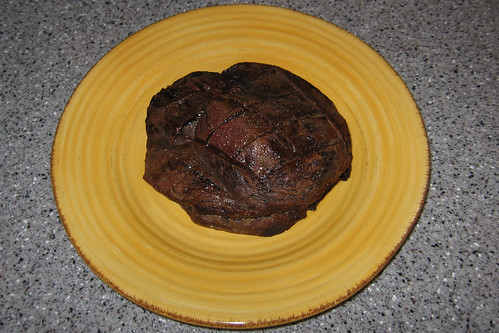
2009 01 18 roast

(It's about time I started including pics of what I make.)

I opted to serve the meat chilled as I had a casserole to make and didn't want to have meat cooking in the oven at the same time as the vegetarian casserole. The meat turned out very flavorful and very, very tender. The garlic, mustard, and horseradish gave the meat a little bite without overwhelming the intrinsic flavor of the meat. The marinade created a light crust that kept the juices in the meat; I had very few drippings into the pan.